
🌵 Cactus Rescue Journey: Phase 2 & 3 — Callusing, Root Prep & the First Potting Day
After stabilizing both rescued hotel cacti in Phase 1, the real recovery work begins. This stage of the journey focuses on patience, preparation, and creating the right foundation for healthy future growth. In this combined update, I walk through the entire second and third phases of the restoration process — from callusing the damaged cutting to moving both plants into fresh soil for the first time. (see photos below)
🌱 Phase 2: Callusing, Root Rest & Recovery Prep
“Where real healing begins.”
After discovering the severe rot inside the columnar cactus, the only option was to take a clean, healthy cutting and allow it to heal naturally. At the same time, the rescued barrel cactus needed root recovery after I removed the compacted hotel soil it had been surviving in.
Both plants entered a period of rest, and while it may look like nothing is happening from the outside, this is one of the most important steps in cactus rescue.
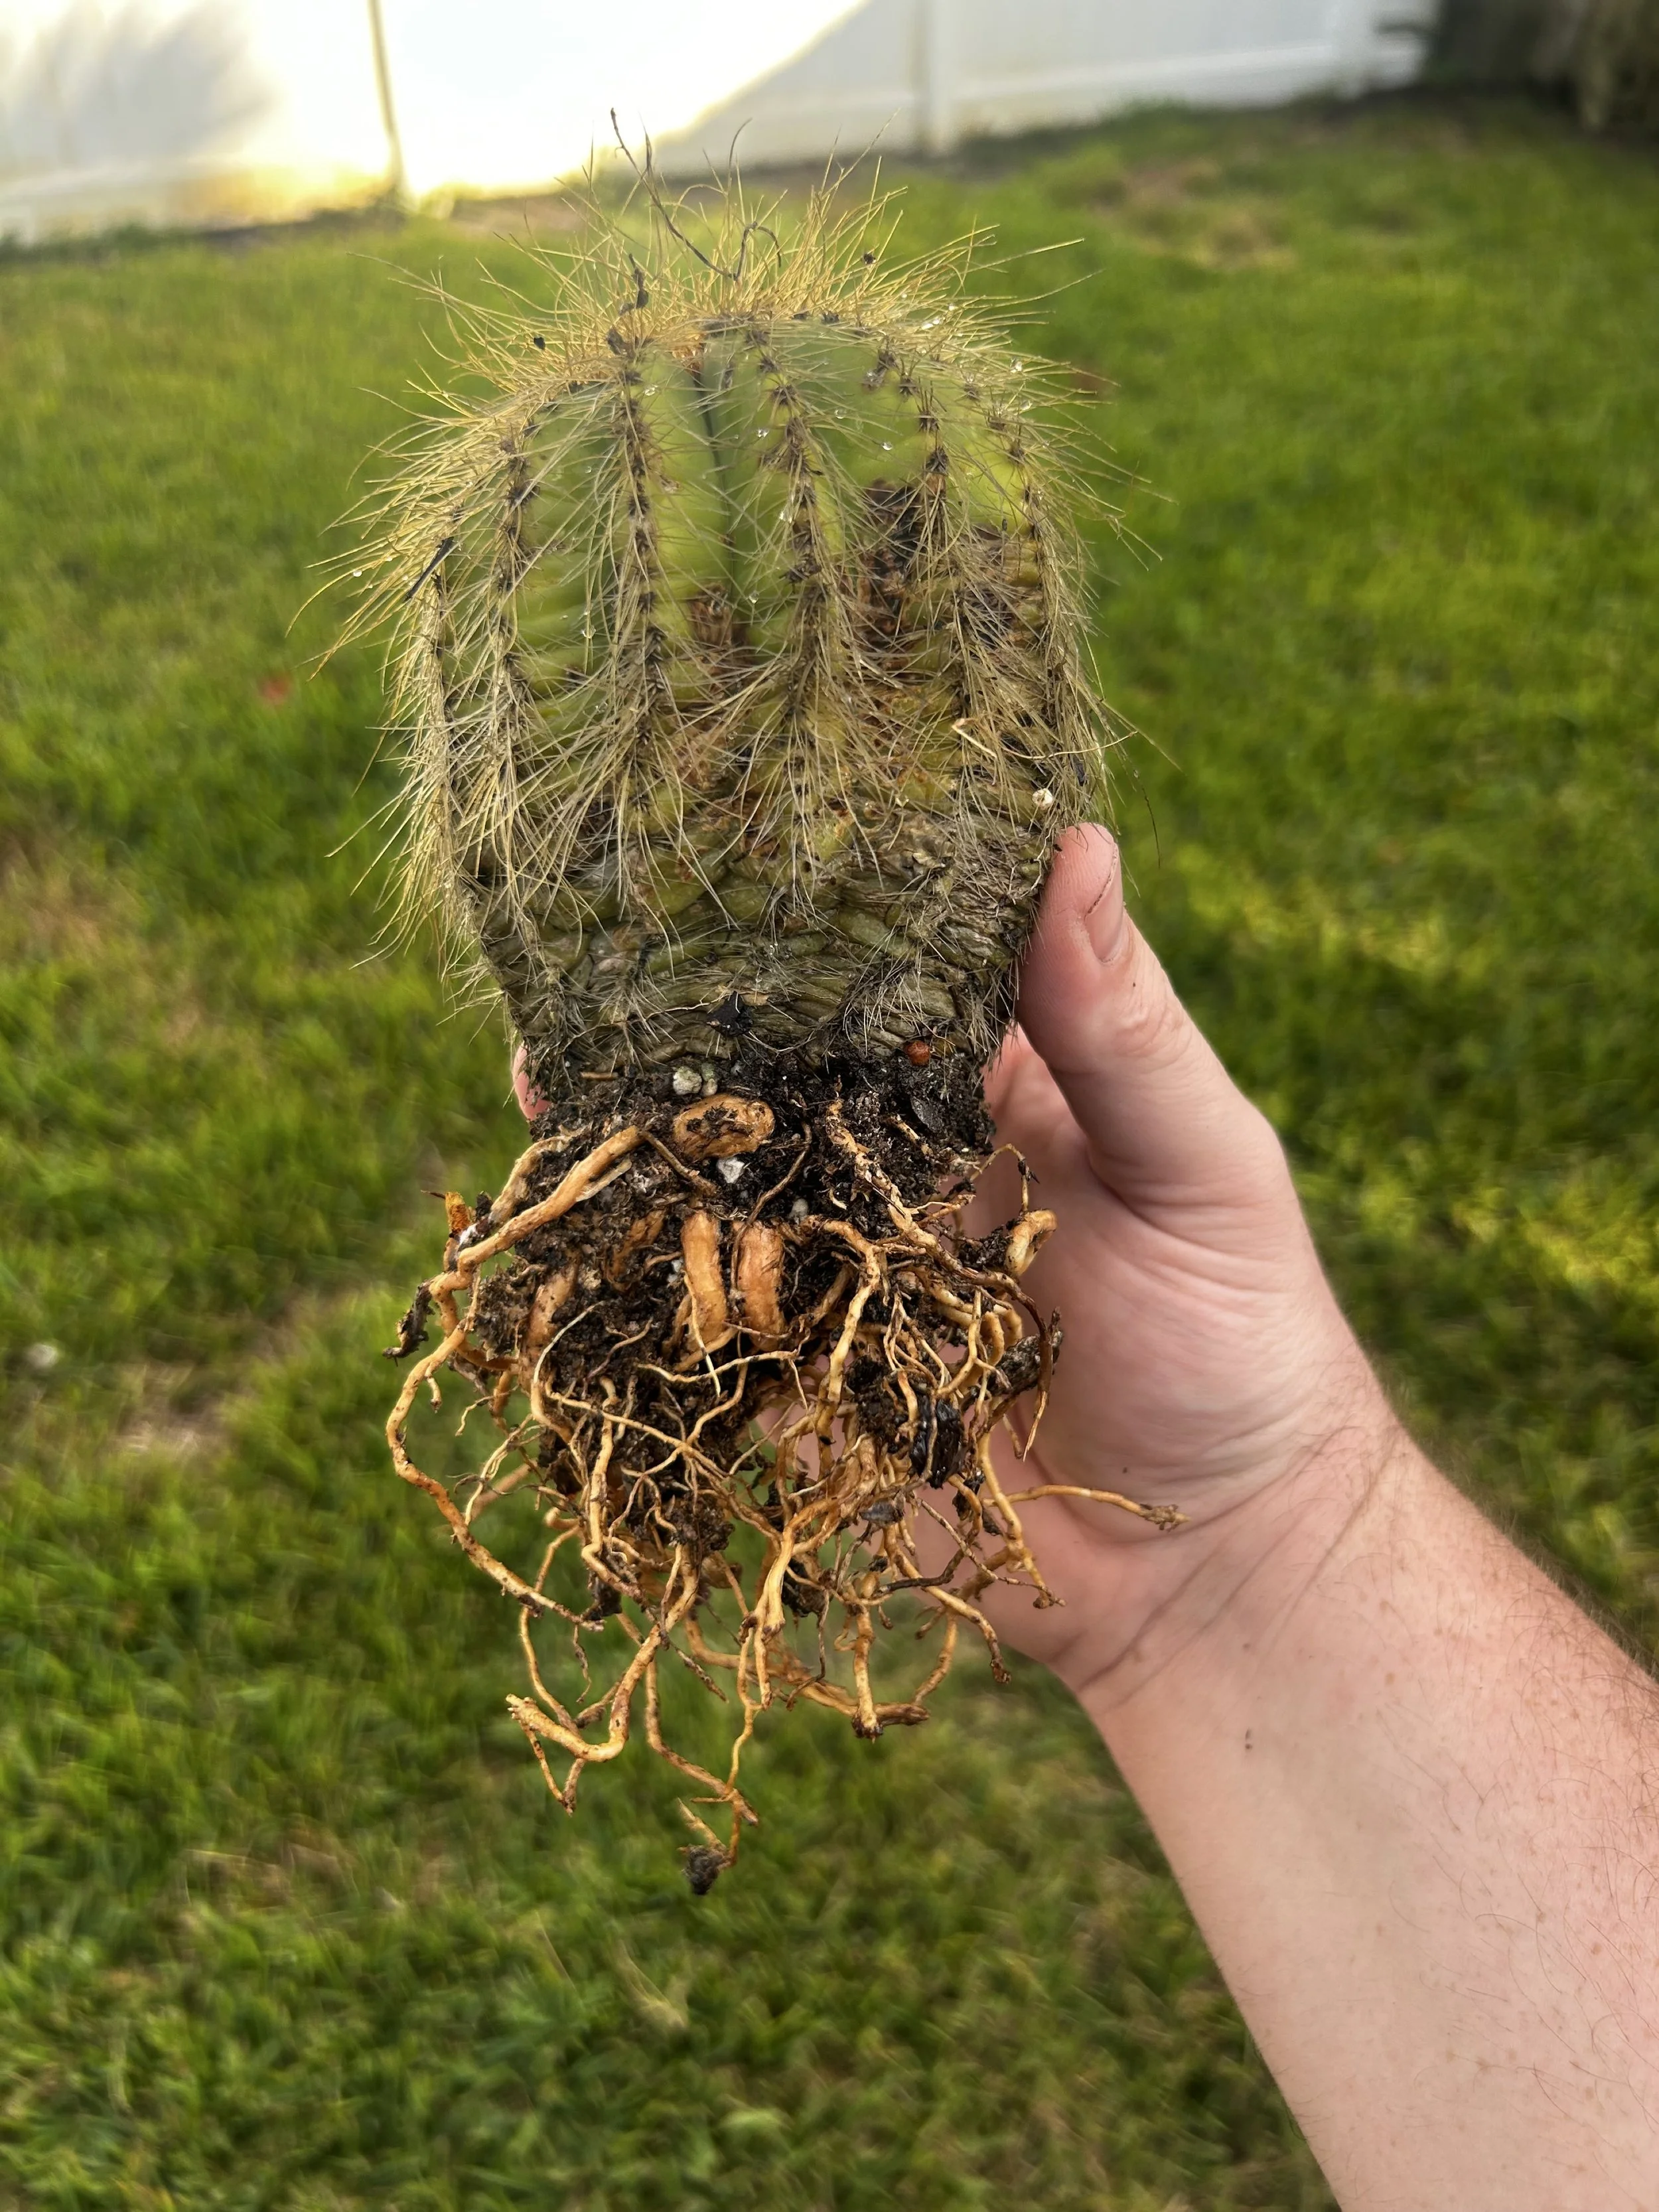
Why the Roots Needed to Rest After Cleaning
Once I removed all the old, compacted soil and washed away the debris clinging to the roots, it was important not to repot the cactus immediately. Instead, the roots were left to dry and stabilize — and here’s why this rest period is so crucial:
1. Freshly disturbed roots are vulnerable to rot.
Washing and handling roots creates tiny openings in the tissue.
If placed into damp soil right away, moisture can seep into those wounds and lead to bacterial or fungal rot deep within the root system.
Allowing them to dry gives the roots time to seal and strengthen.
2. The plant needs to reset its hydration signals.
The cactus came from highly compacted soil that held moisture unevenly. Cleaning the roots essentially resets the plant’s environment.
The rest period tells the cactus:
“We’re entering a safe, dry period — conserve energy and prepare for new growth.”
This stabilizes the plant before it must adapt to new soil.
3. Drying the roots helps eliminate leftover pathogens.
Compacted soil can house fungus spores and bacteria.
A dry period helps kill harmful microorganisms that thrive in moisture.
4. Dry roots become tougher and anchor better.
Just like the cutting must callus, roots also benefit from a short recovery window so they can harden, close microscopic wounds, and prepare for re-establishing themselves in new soil.
5. It prevents transplant shock.
Repotting immediately after washing roots can cause stress symptoms such as:
Yellowing
Softness
Sudden dehydration
Root collapse
Letting the roots rest first minimizes that shock and supports a smoother transition.
This simple pause dramatically increases the cactus’s chance of long-term survival.
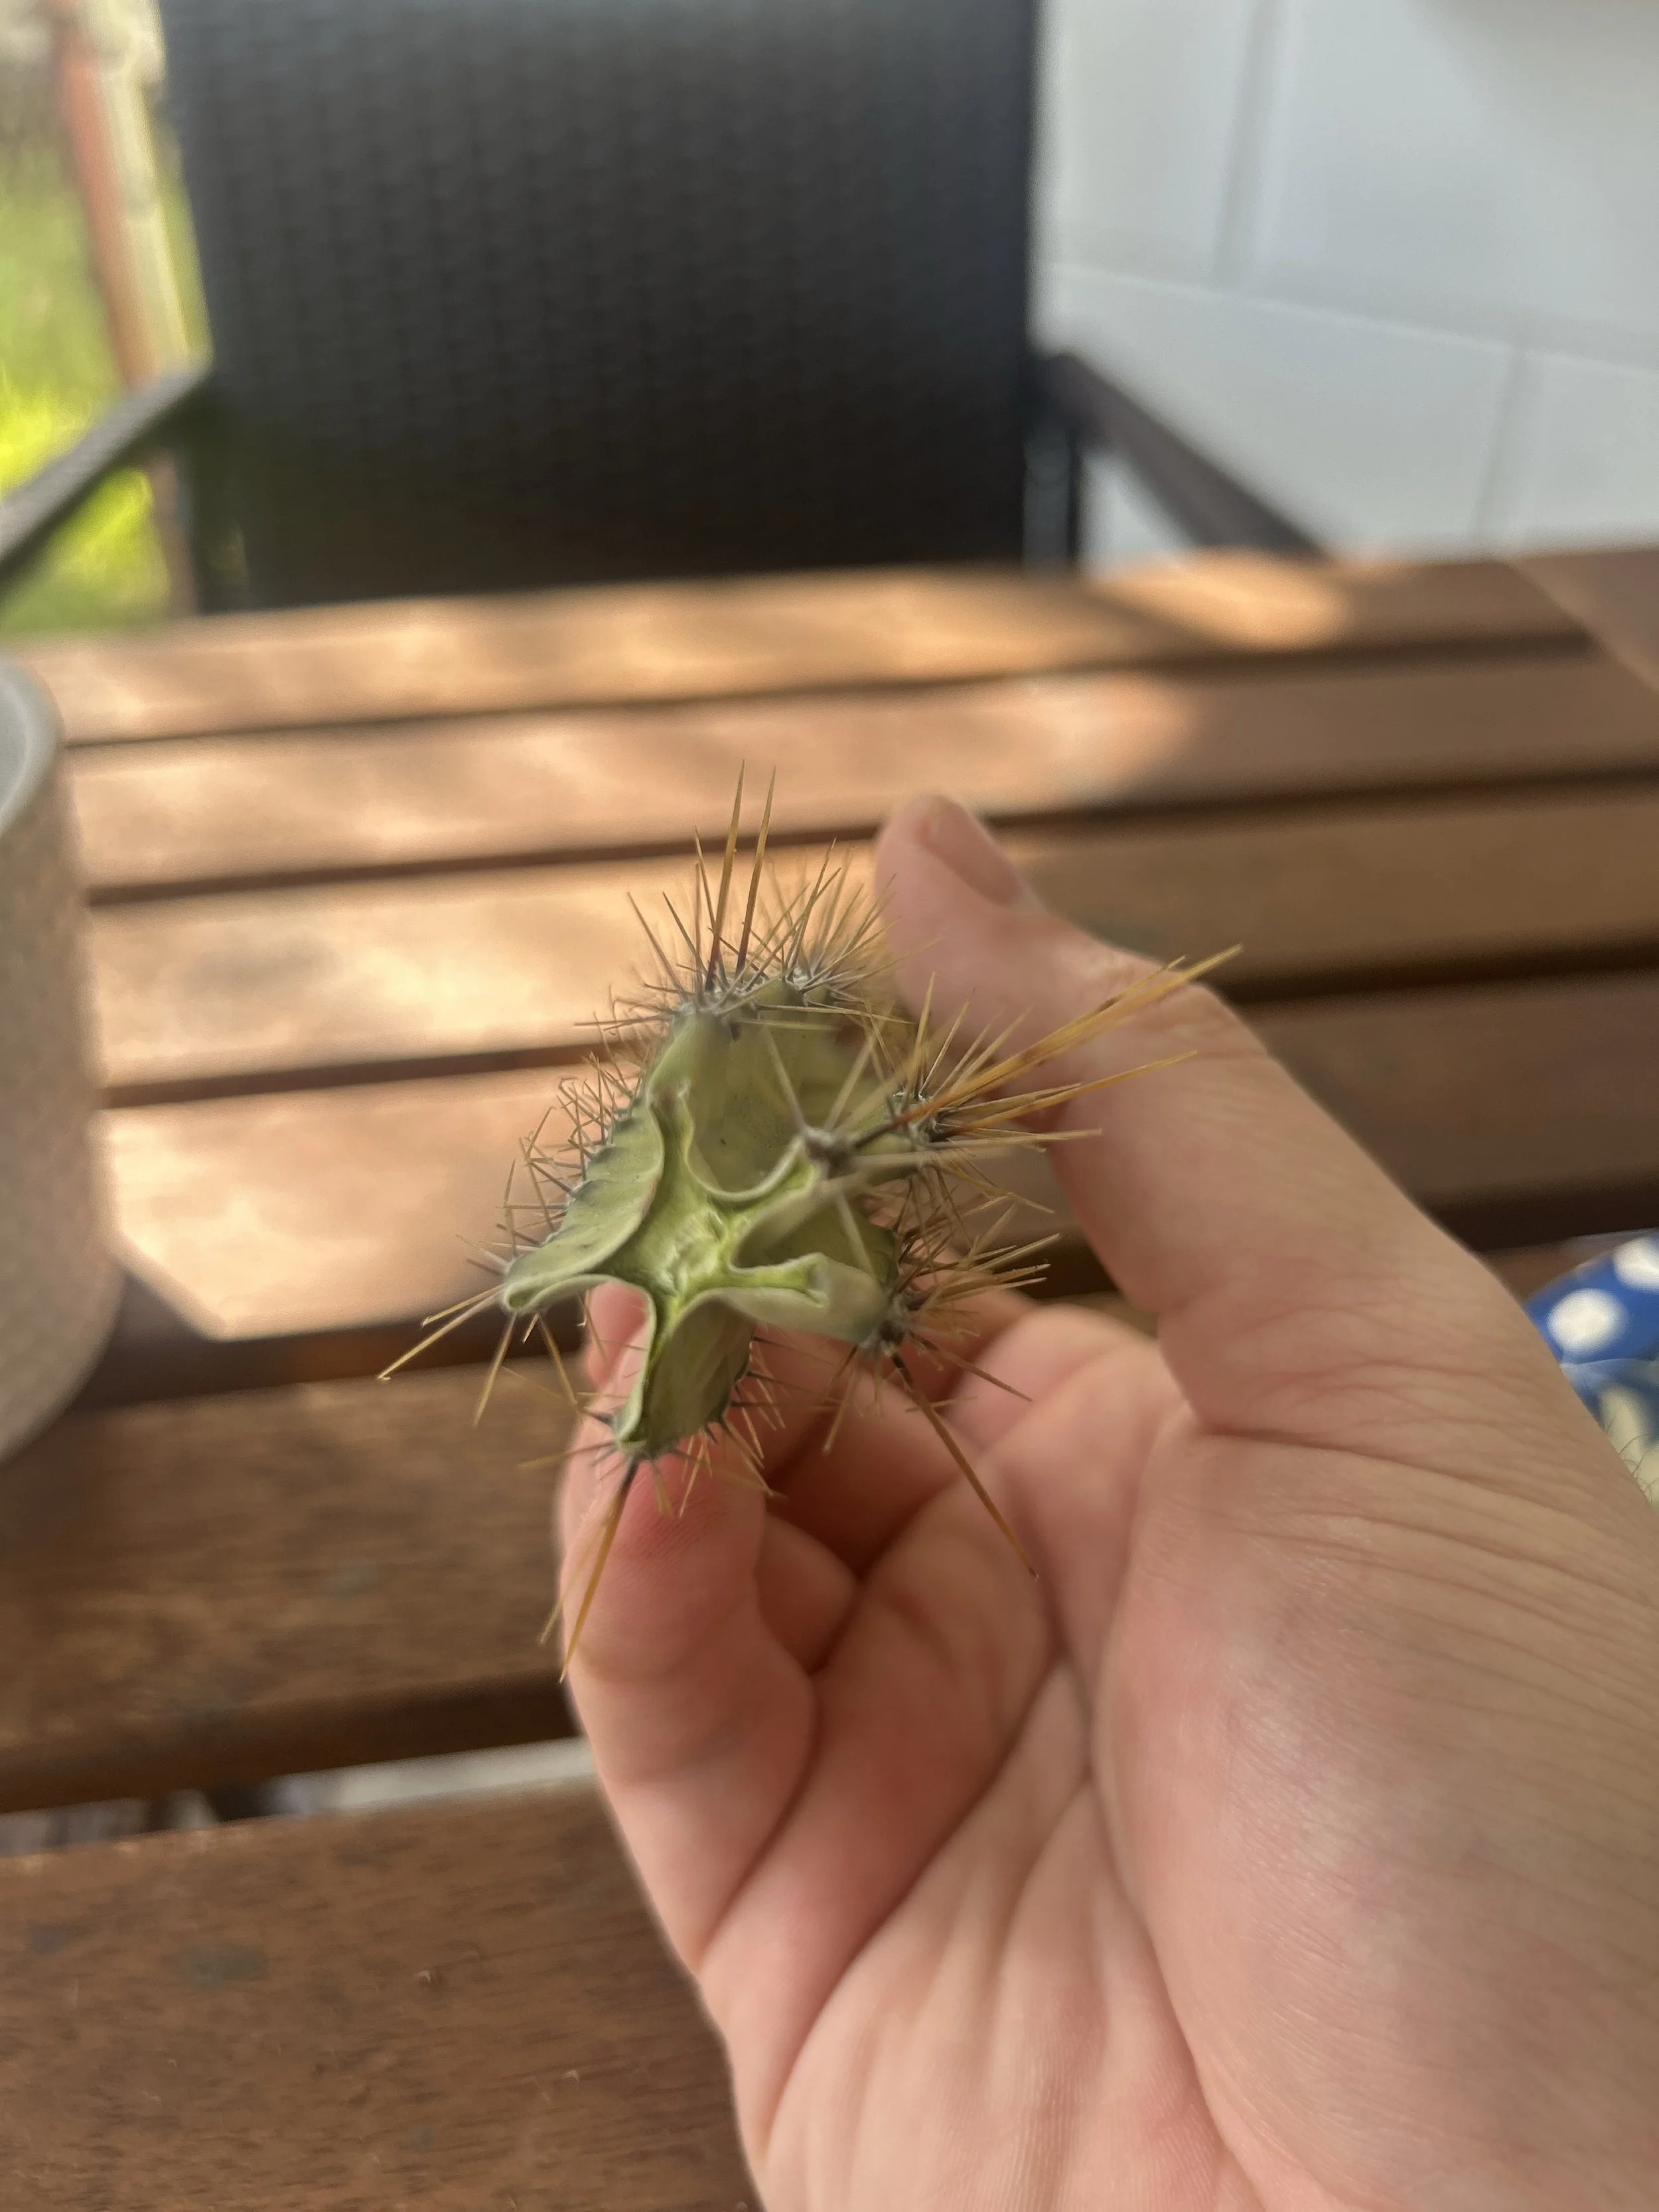
Callusing the Cutting
For the columnar cactus, the healing process was even more intense. After cutting away the rotted interior, the fresh wound needed time to dry, seal, and develop a protective callus. This step ensures the cutting won’t absorb moisture too soon — which would cause instant rot.
I placed the cutting in:
Bright but indirect light
A dry, warm space
With plenty of airflow
Absolutely no moisture exposure
Over the next several days, the cut surface transformed from soft and moist to firm and leathery. Once the callus fully formed, the cutting was safe to pot — but still not ready for water.
🪴 Phase 3: Fresh Soil, Correct Pots & First Hydration
“A new home for a second chance.”
Once both the callus and the root rest period were complete, it was finally time for one of the most exciting milestones in any rescue: potting day.
Choosing the Right Soil Mix
For stressed or newly rescued cacti, the soil must be:
Fast-draining
Gritty and airy
Low in organics
The mix I used included:
Pumice
Coarse sand
Indoor succulent soil
A touch of natural bark
This creates an environment where water moves freely and roots can breathe — crucial for preventing future rot.
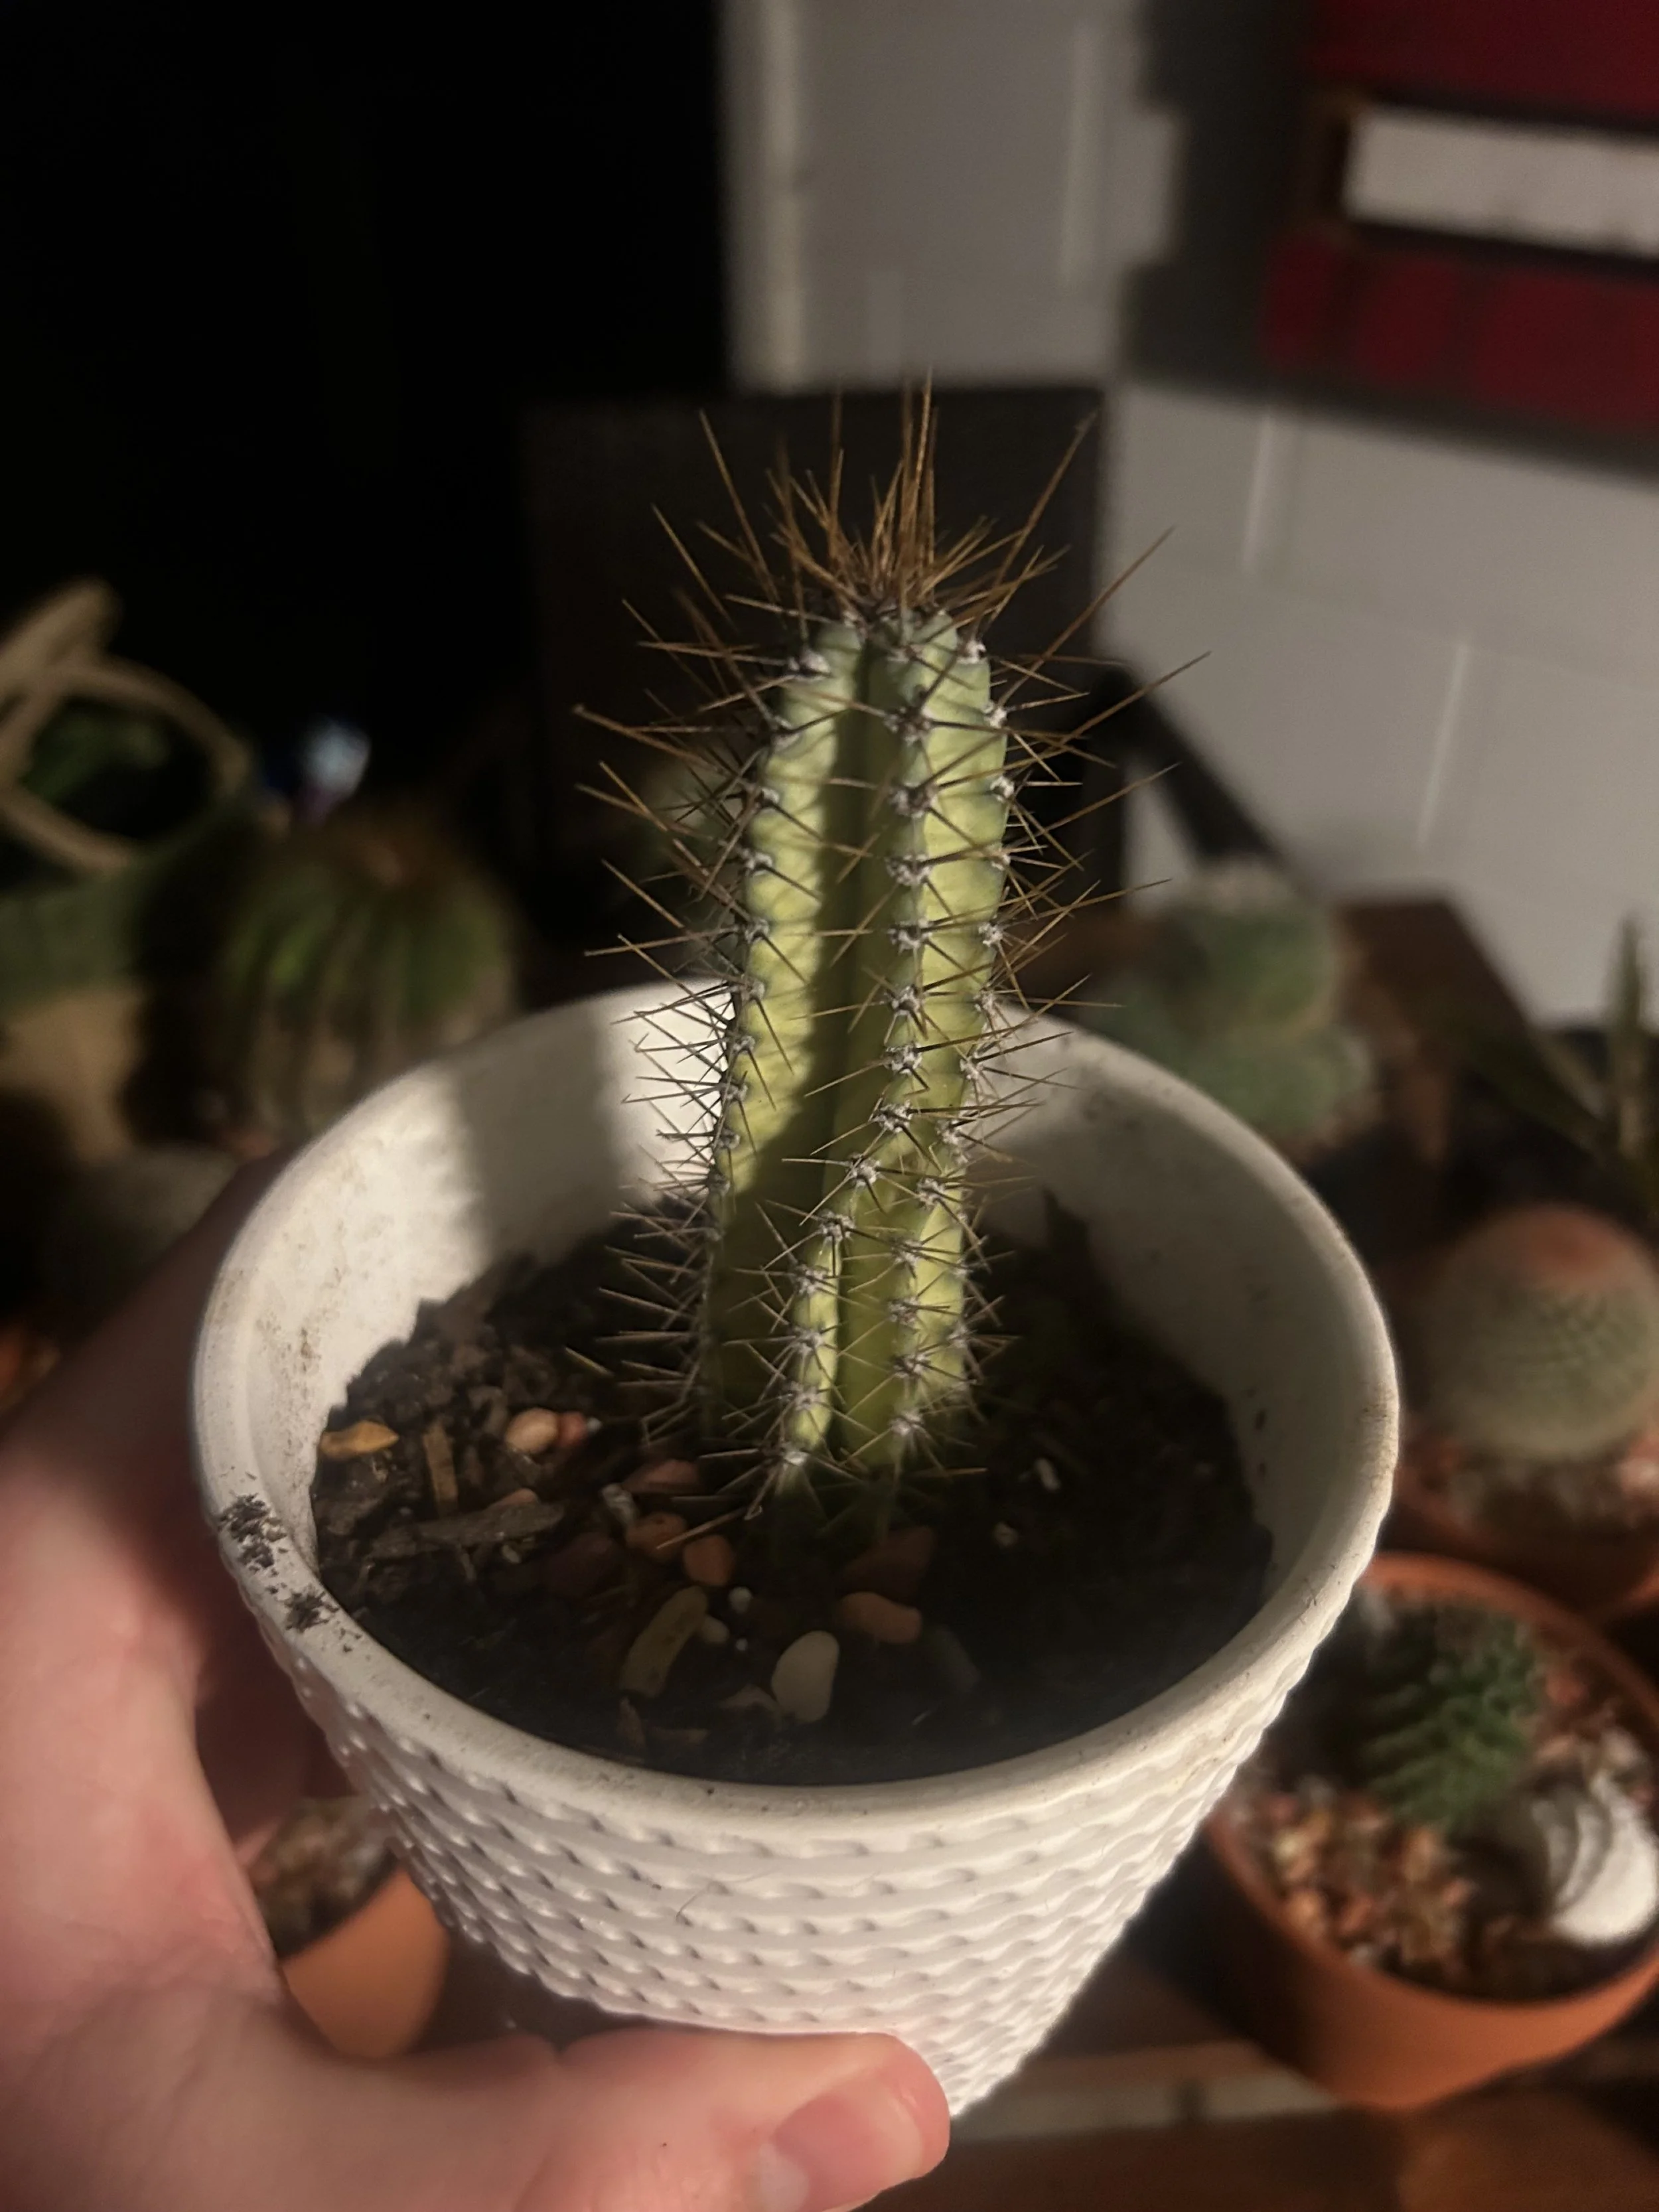
Pot Selection
Both cacti were given terra-cotta pots with large drainage holes.
Terra-cotta breathes, meaning moisture evaporates more quickly, which is ideal during recovery.
Columnar cutting: Planted shallowly, just deep enough to stay upright
Barrel cactus: Positioned slightly above the soil line to prevent moisture pooling around the base
The First Watering Strategy
Watering during recovery must be extremely intentional.
For the cutting:
No water yet
It must develop roots before receiving moisture
Watering early can cause immediate rot since the plant cannot absorb it
For the barrel cactus:
A small, conservative watering after the roots had rested and settled
Just enough to gently reintroduce moisture without overwhelming the weakened root system
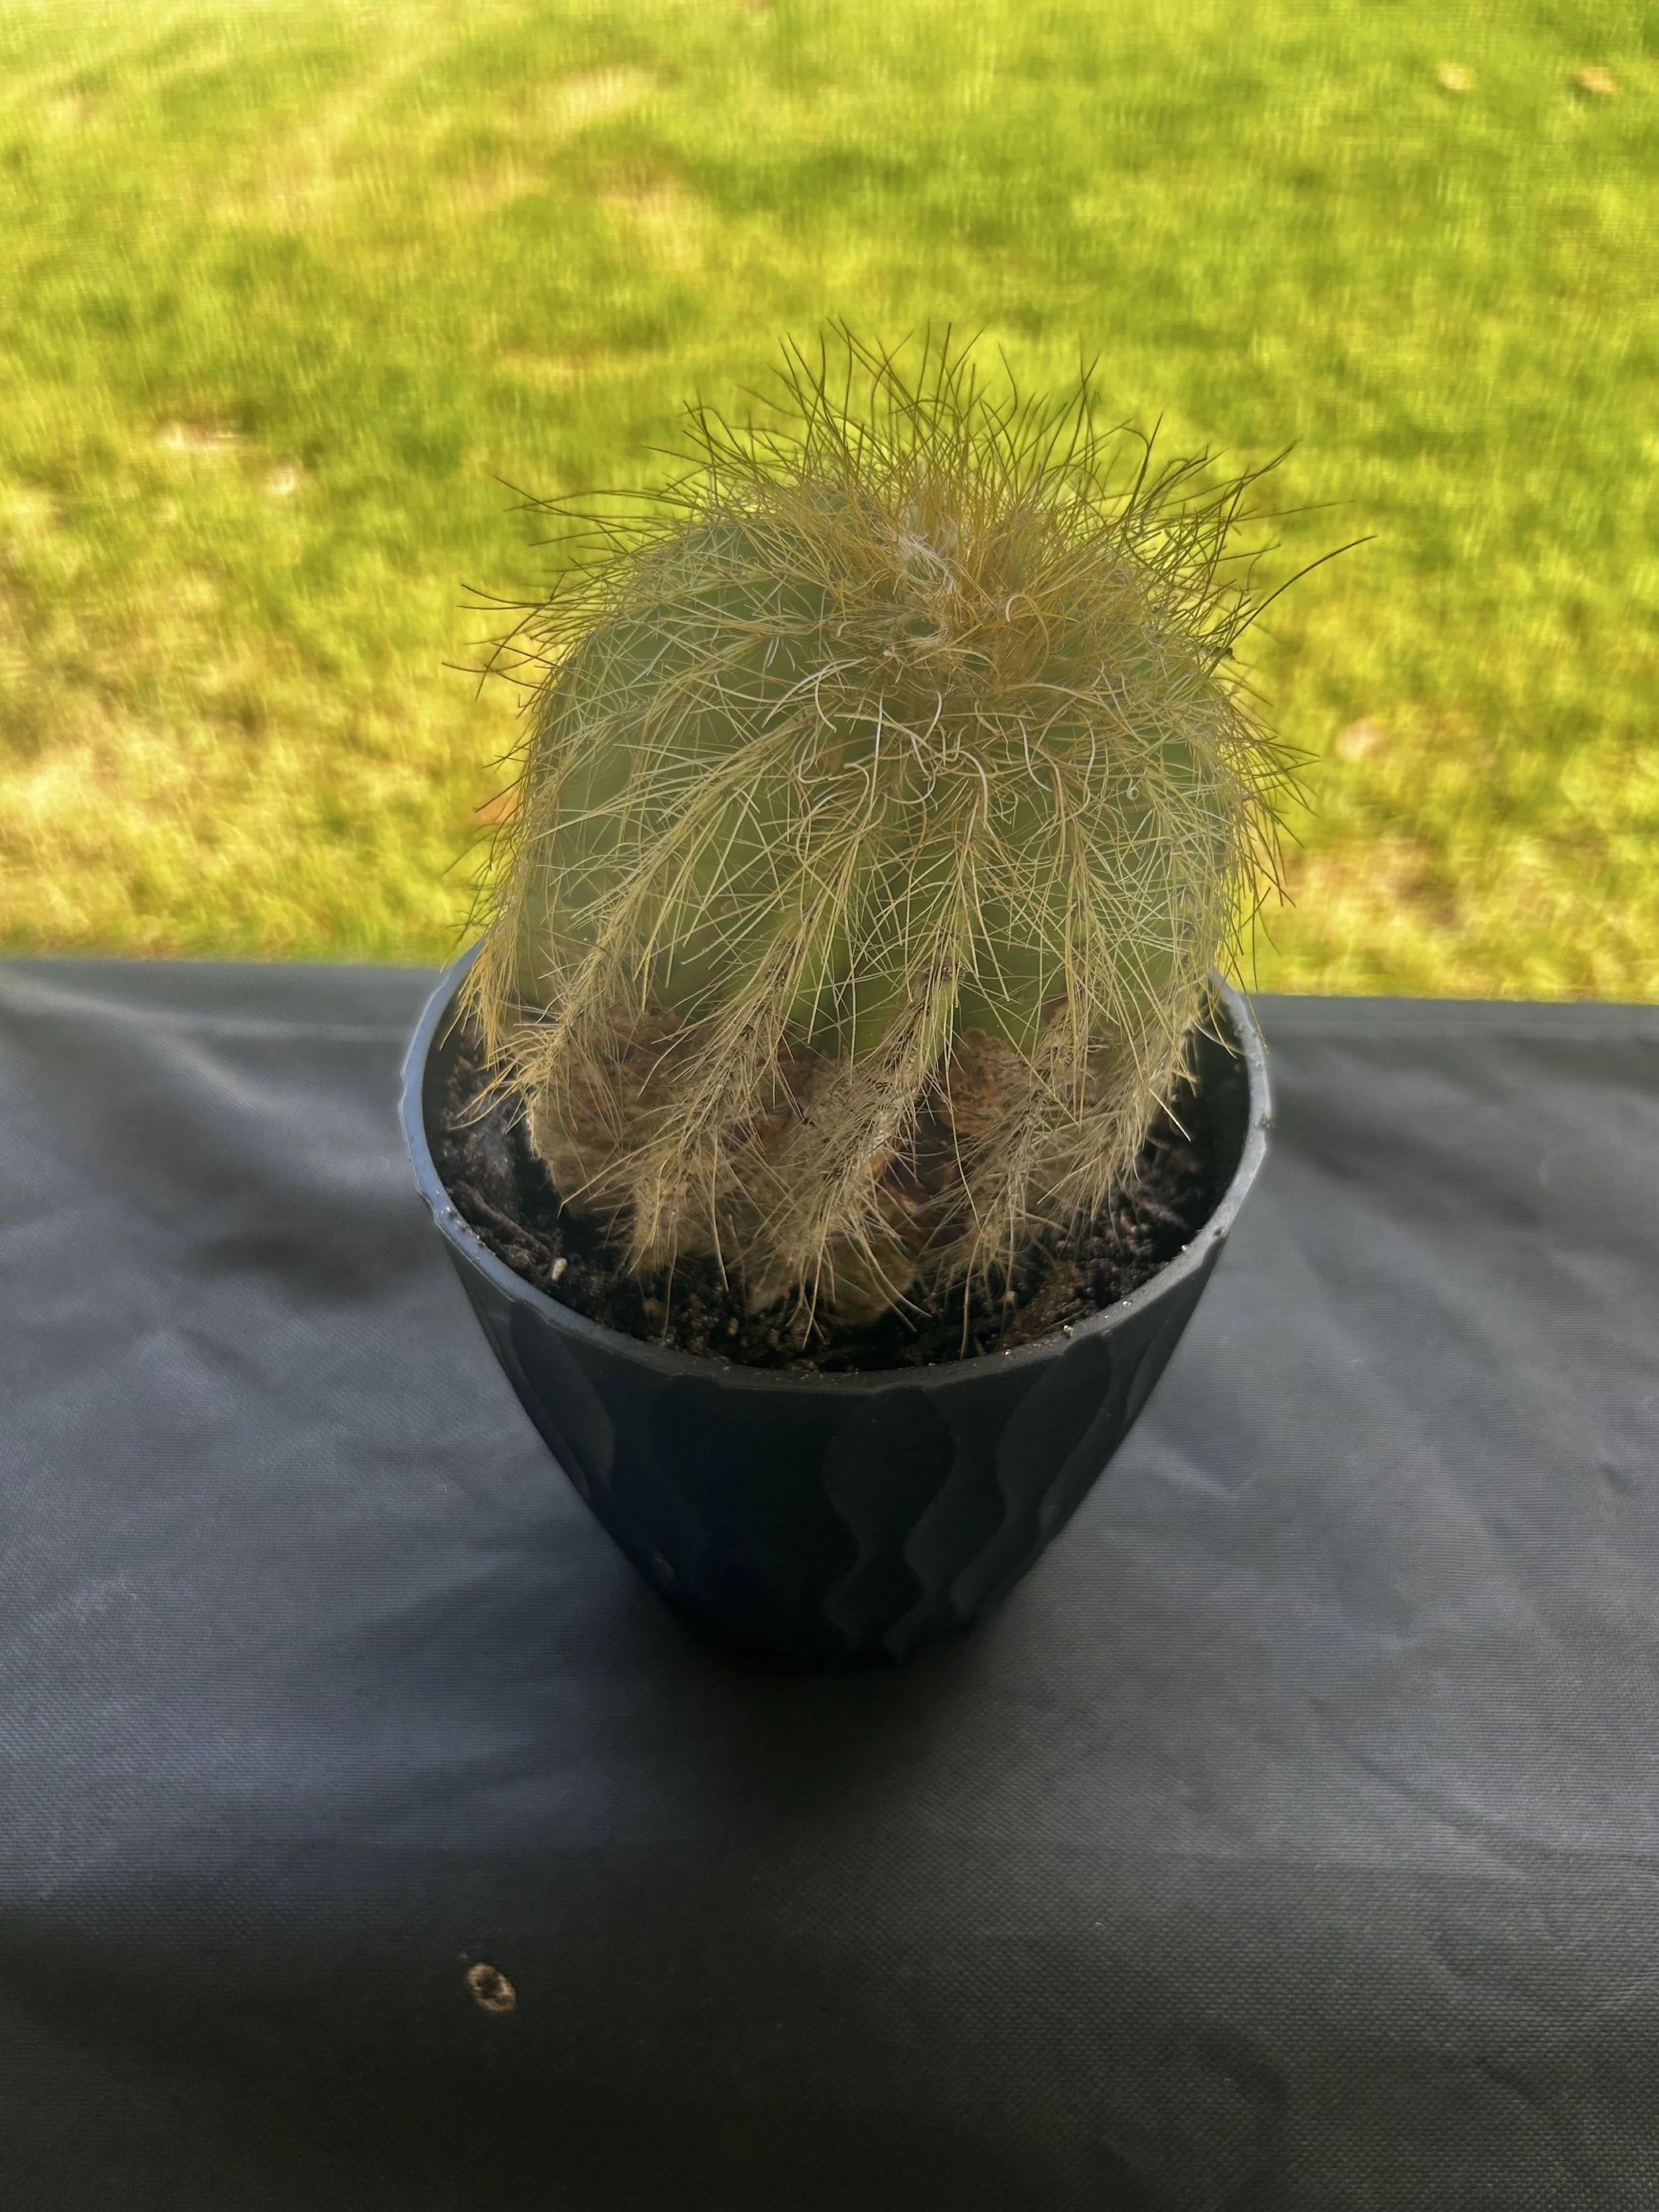
Lucky for me the soil I planted it in was quite damp, so the barrel cactus really did not need to receive any additional water.
Based on the photo above the (taken a few days after potting) it LOVED the water it received. The spines started to spread outward once again the plant just looked happier.
Early watering mistakes are the most common cause of rescue failure — so patience is key.
🌤️ What Happens Next
Now that both cacti are comfortably settled into fresh soil, the next phase will focus on:
Gradual light acclimation
Watching for new root development
Monitoring firmness, wrinkles, and color changes
Carefully spaced watering
Observing signs of stress vs. signs of growth
Cactus recovery is a slow, deeply rewarding process. Every small change — every bit of firmness, every shift in color, every new root — marks a meaningful step toward rehabilitation.
Phase 4 will explore light acclimation and the early signs of recovery, including how the plants respond to their new environment.